
Learn how to GST Registration online with this complete step-by-step guide. Discover required documents, GSTIN verification, and tips for businesses.
Imagine starting a small business and receiving your first big order — but then you hear the client ask,
“Can you share your GST number?”
For thousands of new entrepreneurs, freelancers, and shop owners in India, this moment marks the start of an important journey — getting registered under the Goods and Services Tax (GST).
Since its launch in July 2017, the GST system has made taxation transparent and uniform across the country. But one of the biggest questions for small business owners remains:
“How do I register for GST online?”
Don’t worry — you don’t need an accountant or middleman to do it for you. In this blog, we’ll walk through 7 simple steps to register for GST, understand the documents you need, and avoid common mistakes that could delay your approval.
1. Who Needs to Register for GST?
Before diving into the process, let’s clear the basics. Not everyone needs a GST registration — but if you fit certain categories, it’s mandatory.
✅ Mandatory Registration Applies To:
- Businesses with annual turnover above ₹40 lakhs (₹20 lakhs for service providers).
- E-commerce sellers (like Amazon or Flipkart vendors).
- Interstate suppliers of goods or services.
- Casual taxable persons (selling at fairs or exhibitions).
- Foreign service providers supplying digital services in India.
💡 Voluntary Registration:
Even if your turnover is below the threshold, you can register voluntarily to claim input tax credit and boost business credibility.
2. Documents Required for GST Registration
Before you start, prepare these documents. Having everything ready saves hours of hassle later.
📋 Essential Documents
- PAN Card of the business or proprietor
- Aadhaar Card of the applicant
- Proof of business registration (Partnership Deed, Incorporation Certificate, etc.)
- Address proof of business (rental agreement, utility bill, etc.)
- Bank account details (cancelled cheque or bank statement)
- Photograph of the business owner
- Digital Signature Certificate (DSC) for companies/LLPs
💡 Tip: For sole proprietors, PAN and Aadhaar of the individual are sufficient.
3. Step-by-Step Process on the GST Portal
Let’s go step by step through the official GST registration process on gst.gov.in.
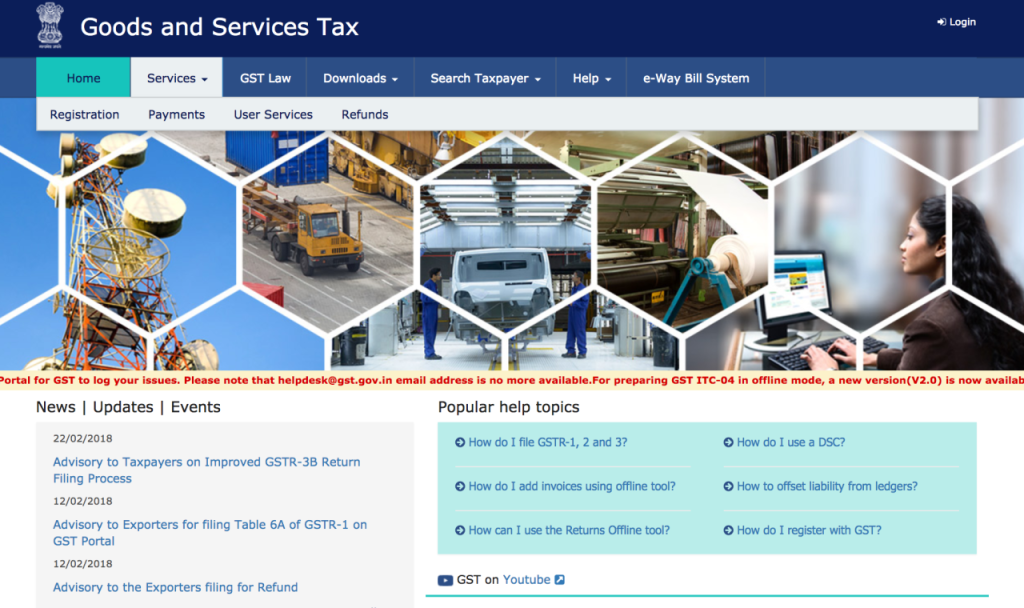
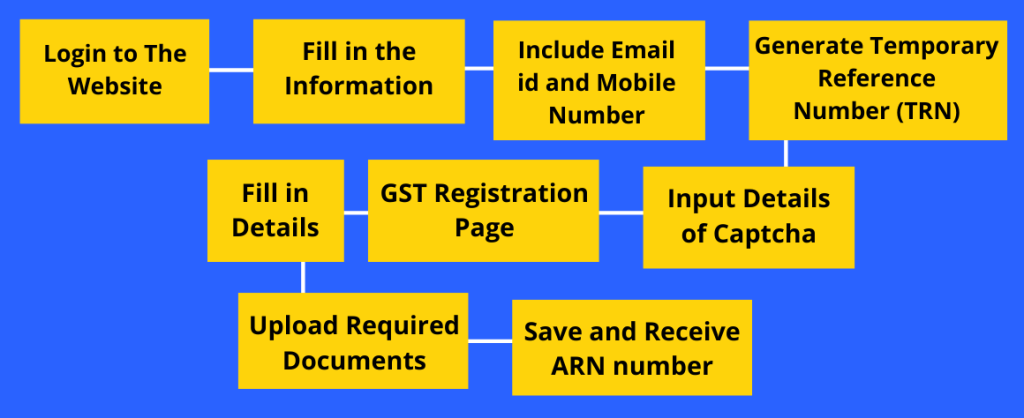
Step 1: Visit the GST Portal
Go to the official website and click “Services → Registration → New Registration.”
Step 2: Fill in Basic Details
Provide the following:
- Type of taxpayer (Regular, Composition, etc.)
- State and district
- Legal name of the business (as per PAN)
- Email and mobile number for OTP verification
Step 3: Verify OTP
You’ll receive OTPs on both mobile and email. Enter them correctly to proceed.
Step 4: Temporary Reference Number (TRN)
After OTP verification, you’ll receive a 15-digit TRN.
Use this TRN to continue the application later if needed.
Step 5: Fill Part B of the Form
Once logged in with TRN, upload the required documents:
- Business address proof
- Bank details
- Business constitution certificate
- Identity documents
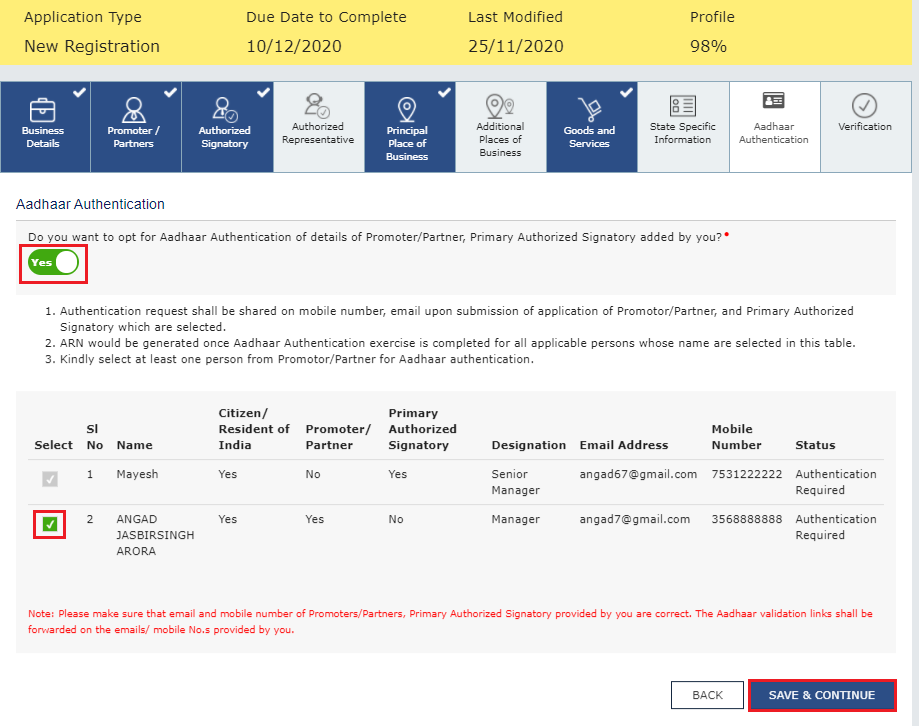
Step 6: Verification and Submission
Once all documents are uploaded, verify using:
- Digital Signature (DSC) for companies, or
- EVC (Electronic Verification Code) for proprietors and partnerships.
Step 7: ARN and GSTIN Generation
After submission, you’ll get an Application Reference Number (ARN) via email/SMS.
Use this to check your registration status. Once approved, you’ll receive a 15-digit GSTIN — your unique tax identification number.
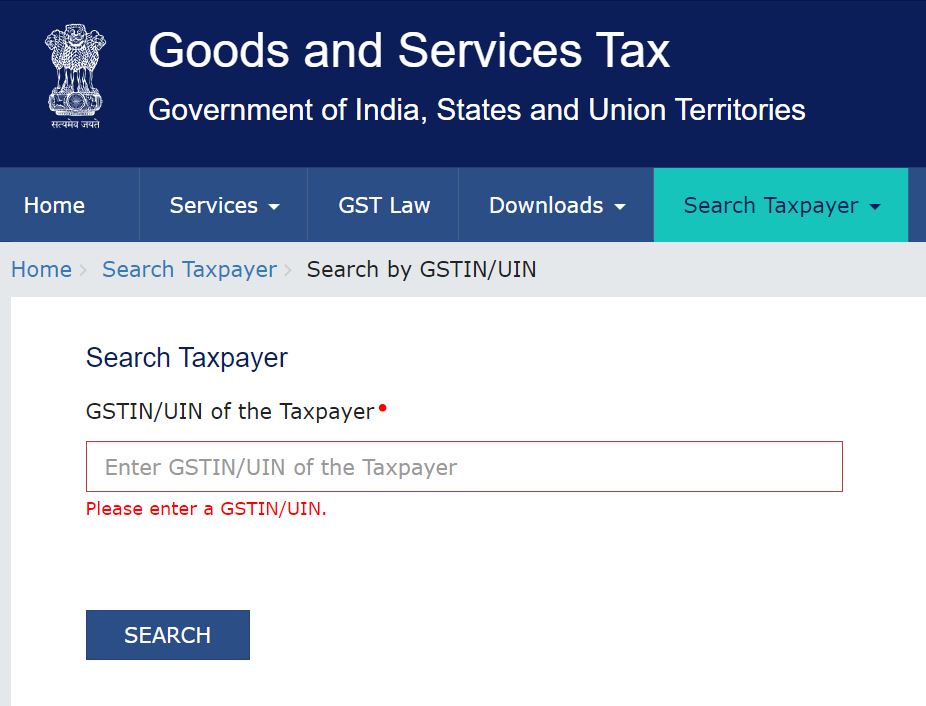
4. How to Verify Your GSTIN
Once you get your GSTIN, it’s essential to verify it online.
Verification ensures that your business details are active and correct.
Steps to Verify:
- Visit gst.gov.in → Search Taxpayer → Search by GSTIN/UIN.
- Enter your 15-digit GSTIN number.
- View details like:
- Legal name of business
- Registration status
- Type of taxpayer
- Date of registration
5. Common GST Registration Mistakes (and How to Avoid Them)
Even small errors can lead to rejection or delays.
Here are the most common mistakes businesses make — and how to fix them.
❌ Mistake 1: Mismatch Between PAN and Business Name
Always ensure the PAN name matches your business registration details.
❌ Mistake 2: Incorrect Address Proof
Upload clear, valid documents. Expired rental agreements or mismatched addresses are common rejection reasons.
❌ Mistake 3: Using Personal Email or Mobile Number
Use a dedicated business email and phone number for registration and future updates.
❌ Mistake 4: Not Saving TRN
If you exit the form without saving your TRN, you’ll have to start over.
✅ Fix:
Double-check every field before submission and maintain digital copies of all uploaded files.
6. GST Registration for Proprietors and Small Businesses
For sole proprietors and small businesses, registration is simpler — but still mandatory if annual turnover exceeds ₹40 lakhs (₹20 lakhs for services).
Why Proprietors Should Register:
- Builds credibility with clients and vendors
- Enables input tax credit on purchases
- Makes participation in e-commerce and tenders easier
Cost of Registration:
- Free of charge on the official portal.
- You only pay if using third-party consultants.
💡 Pro Tip: Use official channels only. Many websites charge unnecessary fees — avoid them.
7. GSTIN Format and Meaning
Once registered, your GSTIN (Goods and Services Tax Identification Number) is your official identity under the tax system.
Example GSTIN: 27ABCDE1234F1Z5
Breakdown:
- 27 – State code (Maharashtra)
- ABCDE1234F – PAN of the business
- 1 – Entity number for multiple registrations
- Z – Default alphabet (for future use)
- 5 – Check digit
This number is used for filing returns, raising invoices, and tracking compliance.
Benefits of Online GST Registration
- 💻 Fully Digital Process: No physical visits or paperwork
- 🔒 Secure Verification: Linked to Aadhaar and PAN
- 💰 Cost-Free: No government fee
- ⚡ Fast Approvals: Usually processed within 3–5 working days
- 🧾 Legitimacy: Boosts business trust and vendor relationships
8. After Registration – What Comes Next?
Once you get your GSTIN:
- Display it at your business premises.
- Update it on your invoices, bills, and website.
- File regular returns (monthly or quarterly).
- Maintain records for at least 6 years.
📎 Read Blog 16 – How to File GST Online (Complete Return Filing Guide)
FAQs
1. Is GST registration mandatory for all?
No. It’s mandatory only if turnover crosses ₹40 lakhs or for interstate and e-commerce suppliers.
2. How much does GST registration cost?
It’s completely free on the official GST portal.
3. Can individuals or freelancers register?
Yes. Any person providing taxable services above the threshold limit can register as a sole proprietor.
4. How to check if a business is registered?
Use the GST portal’s “Search Taxpayer” option and enter the GSTIN to verify details.
Conclusion
Getting registered under the Goods and Services Tax isn’t as hard as it sounds.
With the digital GST portal, you can complete the entire process yourself — no agents, no paperwork, and no hidden costs.
This registration not only helps you comply with the law but also positions your business as professional and trustworthy.
Once registered, you can file returns, claim input tax credit, and expand your operations across India without tax barriers.
So, if you haven’t registered yet, it’s time to take that step — and give your business the legal and financial edge it deserves in 2025.